Still stuck copy-pasting data into Google Sheets? Well, my friend, it’s high time for an upgrade. Coming to the point, let’s be real: updating your spreadsheet manually every time there is a change in the information isn’t just boring, it’s error-prone and time-killing. Don’t worry! I’ve got an easy solution to automate your workflows.
Simply, connect Google Sheets with Webhooks using a WordPress automation plugin. Sounds weird, right? Trust me, it’s fun! Just imagine that your spreadsheets will be automatically populated whenever a form is submitted or updated. Absolutely no manual work, no code, nothing. Great, right?
This guide will walk you through the step-by-step process of setting up the integration using this automation plugin. Also, you’ll learn how to send data to Google Sheets. So, without further ado, let’s begin.
But wait! Before we jump into the setup, let’s quickly understand what webhooks are and how automating Google Sheets with webhooks will be beneficial.
In simple terms, webhooks are like notifications. For example, when you withdraw an amount from your bank account, you receive an SMS notification like “$ ****50 withdrawn from AC# 09275B”. They already know your number, so they just notify you of anything that happens to your bank account.
Hopefully, you now have a good idea of what webhooks are. 🙂
Now you must be wondering how webhooks work.
In technical terms, webhooks connect different apps and systems and share information in real-time. Basically, they act as user-defined HTTP callbacks. Whenever any event happens, webhooks send an HTTP POST request to a specified URL. This way, webhooks reduce the need to do periodic data checks as you do with APIs.
Therefore, webhooks, being an efficient option, allow an app to receive data from more than one source in real time.
Webhooks can be used in multiple ways, such as:
Their versatility saves developers significant time and effort.
When you integrate Google Sheets with webhooks, they can receive or send data dynamically, enabling functionalities like automatic updates, notifications, or smooth app connections. Through thorough research, I’ve found some key advantages of Google Sheets Webhook integration:
Install and activate the powerful WordPress no-code automation tool Bit Flows. It is an advanced integration plugin that’ll help you simplify workflow automation on your WordPress website.
Whether you’re connecting WordPress plugins or third-party applications, with Bit Flows, you can do this in no time. That, too, without writing a single line of code.
It follows the simple concept of trigger and action. Triggers are the platform from which you wish to send data, and Action is the platform that receives data from specific triggers. It is a perfect Zapier alternative for WordPress users in terms of flexibility and budget. In Zapier, each integration is called “Zap” and in Bit Flows we say “Flows”, but the functionality is the same.
Let’s begin…
Step 1: Create a new Google Sheet spreadsheet and give the title of the columns as you want.
Step 2: Open Bit Flows dashboard > Navigate to the “Flows” section.
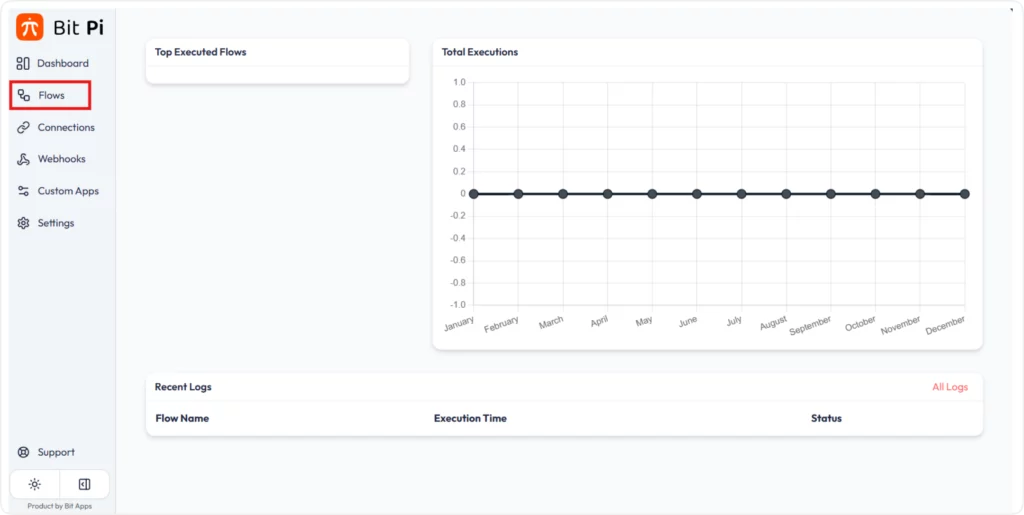
Now, click on “Create Flow” > Give the integration an appropriate name and press “Create”.


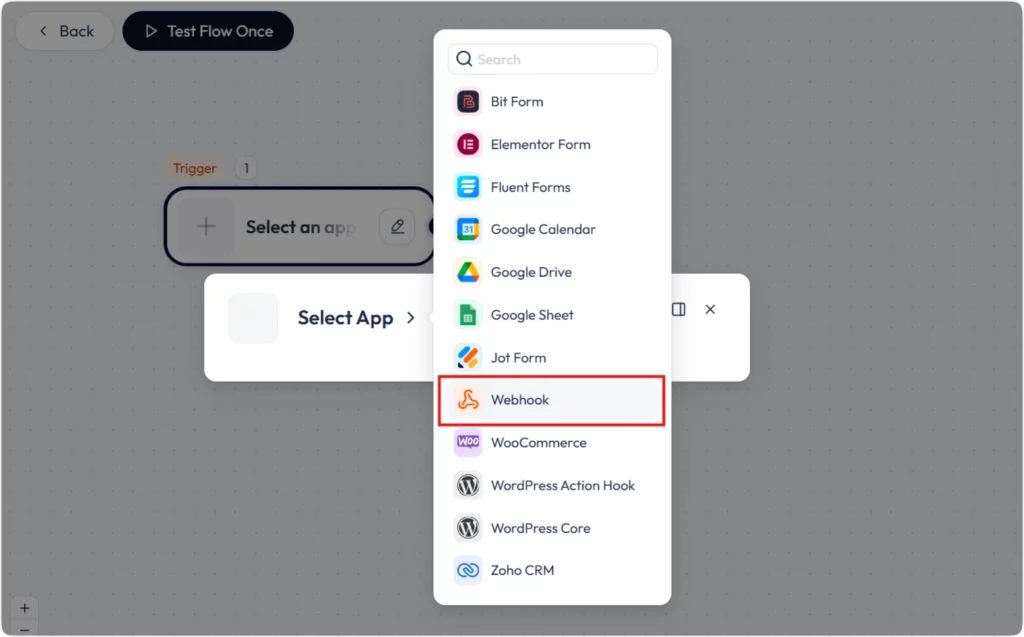
Step 3: Click on “+” and select webhook as the trigger, as we want to send webhook data to Google Sheets.> Click on “Custom Webhook”.

Step 4: If no webhook has been created before, don’t worry! You can create it now. Click on the “Add’ button > Name the hook and save it.

Step 5: Copy the “Callback URL”.

Create a form using any form builder. Here, I am choosing my favorite Bit Form. After setting up the form as per the requirement, move to settings.
You’ll find the Integrations option. Simply go there > Press the “+” sign > Search for webhook > Configure the integration settings:


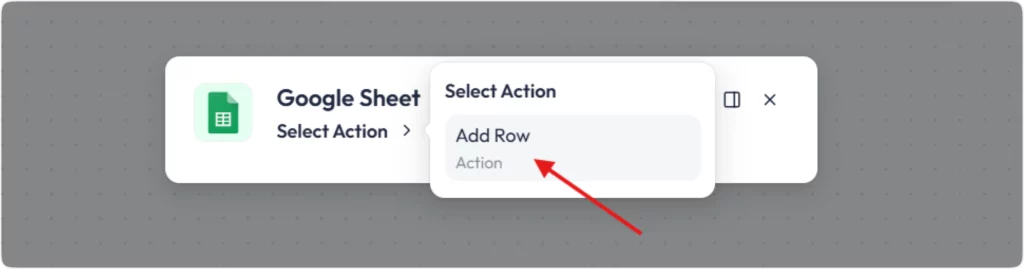
Step 1: On the “Select Action” option, click on “Add Row”
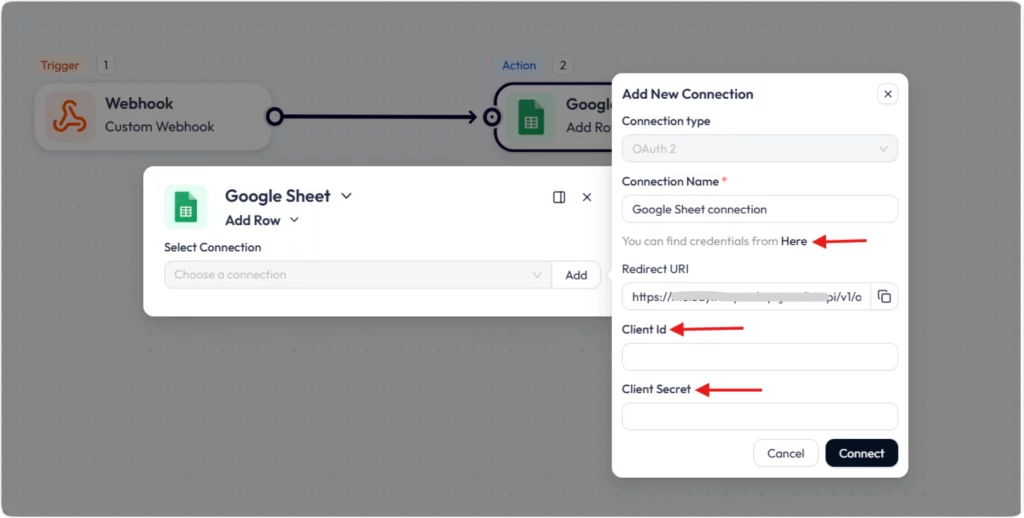
Next, you’ll be asked to select a connection. Since you haven’t created any connections yet, click on ‘Add’ to create a new connection. To do so, you have to authorize your Google Sheets app. For that, you’ll have to collect the Client ID and Secret.
Before finishing the spreadsheet integration setup, submit the form with dummy data so that you can start mapping the fields.
Step 2: Choose the spreadsheet where you want to send webhook data. Then select the sheet number also.

Step 3: Now, start field mapping; for each column of your spreadsheet, assign the webhook data you want to send.

Step 4: The configuration is complete; now you can submit your form, and the Webhook will transfer the data automatically to the desired column in real-time. Look at the images given below.


Did you notice how effortlessly Google Sheet webhook integration is formed and how smoothly you’re able to send your Webhook data to Google Sheet? All credit goes to this incredibly user-friendly automation tool.
And just like that, your Google Sheets webhook integration is complete! Your automated workflow is now ready. Say goodbye to updating your spreadsheets manually and doing repetitive tasks. Thanks to Bit Flows, the automation process is now easier than ever. So if you’re struggling with syncing your form data or automating your tasks, this powerful integration plugin could be a game-changer.
Webhooks are tools that connect different applications and automatically send data from one app to another when a specific event happens. Say, you want to send form entries or payment details to Google Sheets, you can use webhooks to push the data instantly in real time without any coding knowledge. And with Bit Flows, it is way easier.
Yes! Bit Flows offers a no-code solution. You just need to configure Google Sheets as your action app > set up the webhook trigger from your source app > and Bit Flows handles the rest.
When you create a new webhook flow in Bit Flows, it automatically generates a unique Callback URL. Simply copy this URL and paste it into your source app’s webhook integration settings(just like I did earlier). Once triggered, data flows directly into Google Sheets.
Yes, of course! Bit Flows lets you map incoming data to specific columns in your selected spreadsheet.
Inside Bit Flows, you can test the workflow to ensure that the webhook-to-Google Sheets integration is working correctly or not. For that, you just need to click on Test Flow Once. If the connection is successful, new data entries will appear in your Google Sheets in real time.
In that case, Bit Flows includes a log history panel(located at the top-right corner) where you can check your flow’s activity, like status, execution time, action details, etc. Moreover, you may check whether the webhook was triggered or if Google Sheets was properly authorized or not.