Powering your WordPress site with AI has never been easier. Better yet, you can do it for free. Bit Flows is a WordPress automation plugin that connects tools like ChatGPT, Google Gemini, Claude, DeepSeek, and Perplexity to WordPress. No per-task fees. No coding skills needed.
This guide walks you through everything. We cover which AI tools work with WordPress, why Bit Flows beats other free options, real workflow examples you can build today, detailed setup steps, and tips to optimize your results.
Want to auto-generate blog posts? Need fresh product descriptions? Looking to create instant customer responses? Bit Flows handles it all on your own server at no cost.
Many people ask the same question. “Can I integrate AI to WordPress for free?” The answer is yes. Bit Flows offers a free version with optional Pro upgrades. We’ll explain the features, security considerations, and everything in between.
Bit Flows supports many popular AI services natively at no extra cost, aside from API keys.
The OpenAI integration supports chat completions, text completions, image generation, moderation, and data structuring. You can automate entire content workflows in one go. The Gemini integration sends WordPress content to Gemini and captures responses through a simple drag-and-drop interface.
These strengths make Bit Flows the best free option for AI automation on WordPress. You get a Zapier-like platform inside WordPress at no cost.
1️⃣ Auto-Generate Blog Posts using a schedule trigger. Set “every Monday,” add a ChatGPT action to write an article, then publish it automatically. Many bloggers save hours weekly with this setup.
2️⃣ Catchy Titles and SEO Meta get created when posts are drafted. Send content to ChatGPT or Gemini to generate optimized metadata and map it back to post fields automatically.
3️⃣ Social Media Snippets appear after publishing. Send full posts to Gemini to create 2-3 catchy summary sentences, perfect for Twitter or LinkedIn.
4️⃣ Product Descriptions for e-commerce get automated. When products are added, send titles and attributes to AI for persuasive descriptions that update automatically.
5️⃣ Customer Support Responses use ChatGPT or Claude. Connect contact forms to flows where questions get AI-powered replies sent via email instantly.
6️⃣ Content Repurposing happens by asking AI to rewrite articles in different styles or languages, saving editing time.
7️⃣ Image Generation creates custom featured images using DALL·E based on post titles or content.
8️⃣ Data Processing uses AI for tasks like extracting insights from survey data or fetching current market stats through Perplexity.
Real users report saving “hours of writing time” with these AI-powered workflows. Tasks that took minutes manually become instant.
Getting ChatGPT and WordPress working together is straightforward. Here’s how to set up automatic blog posts.
Step 1: Install Bit Flows
Navigate to the WordPress dashboard. Go to Plugins, then Add New. Search “Bit Flows,” click Install, then Activate.

Step 2: Create a New Flow
After activating the plugin, navigate to the Bit Flows menu, then Flows. Click “Create Flow” and give it a title. Then click on the Create button.

Step 3: Add a Trigger
Now you will see the cool Bit Flows builder, where you can play with tools and integrations. At first, we need to add a trigger. Here I will use Bit Form to provide the blog title and some extra information. I have made a form to capture data. You can use any form builder.

To add Bit Form as the trigger, click on the plus Icon of the trigger node and search for Bit Form or any form that you want to connect. Then choose the specific form.

Now you need to click on the “Listen Response” button and submit the form. This will capture your form data for the next step mapping. Here is the captured data in my use case.

Step 5: Generate Content
Drag in the OpenAI (ChatGPT) action. Select “Create a Chat Completion” as the event. And then connect your OpenAI account with your API key. Then select your preferred model and token.
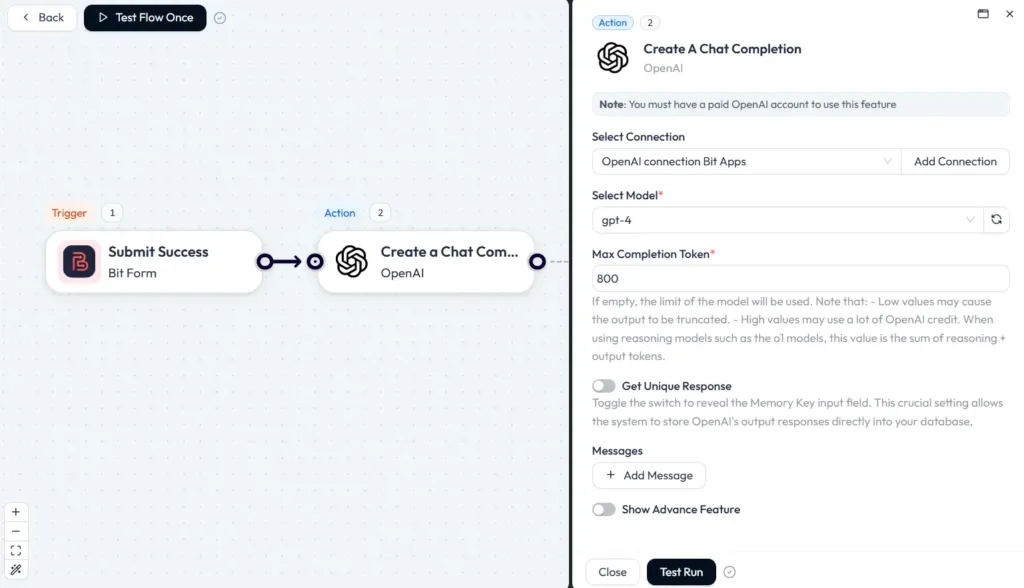
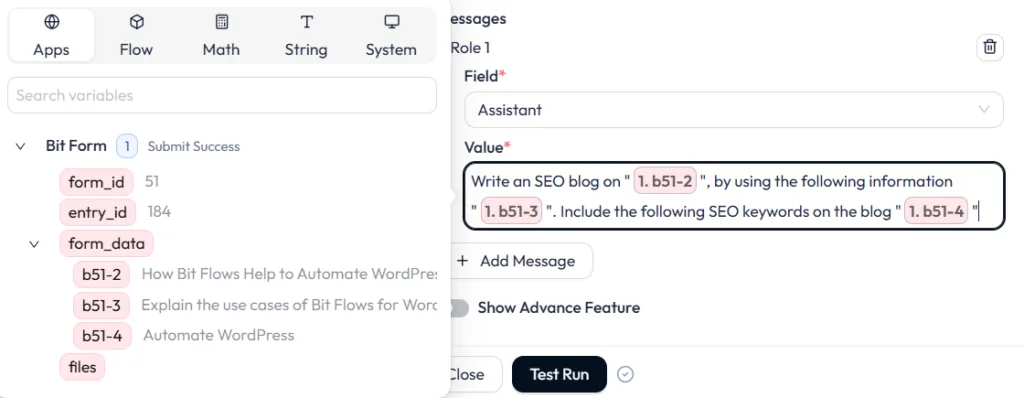
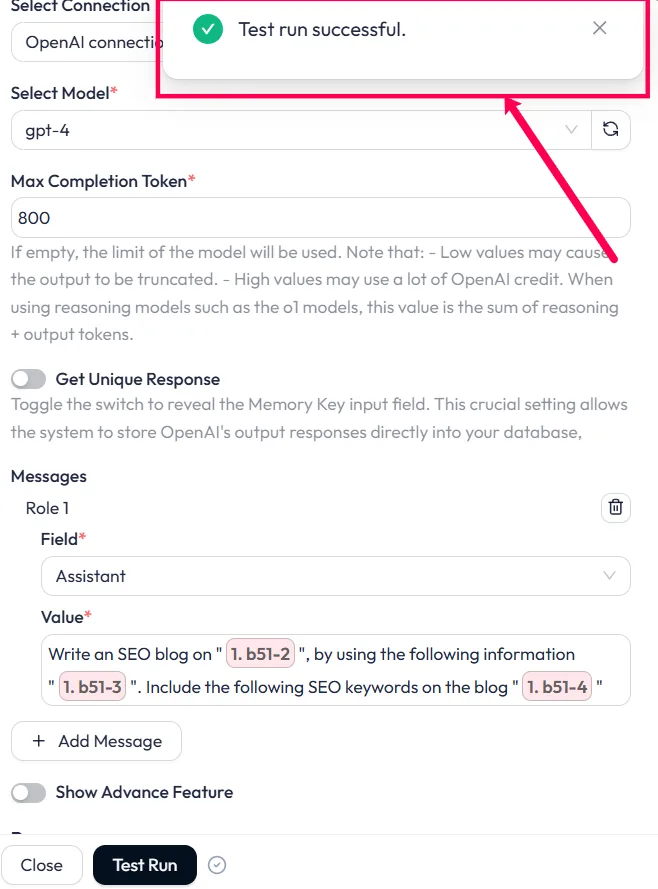
Now we need to add the prompt. To add a prompt, click on the “+ Add Message” button. On the field, select Assistant and add your prompt to the Value.
Now click on the “Test Run” button. Wait for some time and you will see the test run successful message.
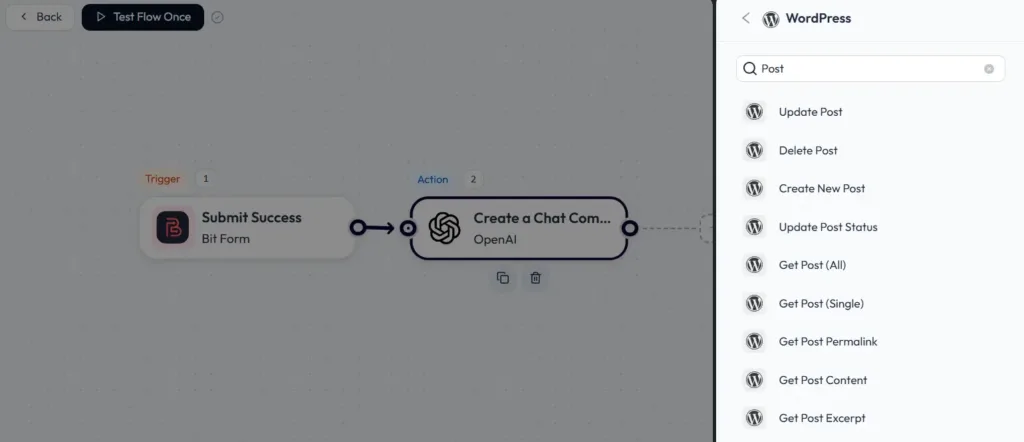
Step 6: Publish to WordPress
As we got the test run successful message, that means ChatGPT generated the blog as per our given information. Now we need to post it to WordPress. To do that, we have to add WordPress as the action and need to select the Create New Post event.
After selecting the event, you will see many post options to map.
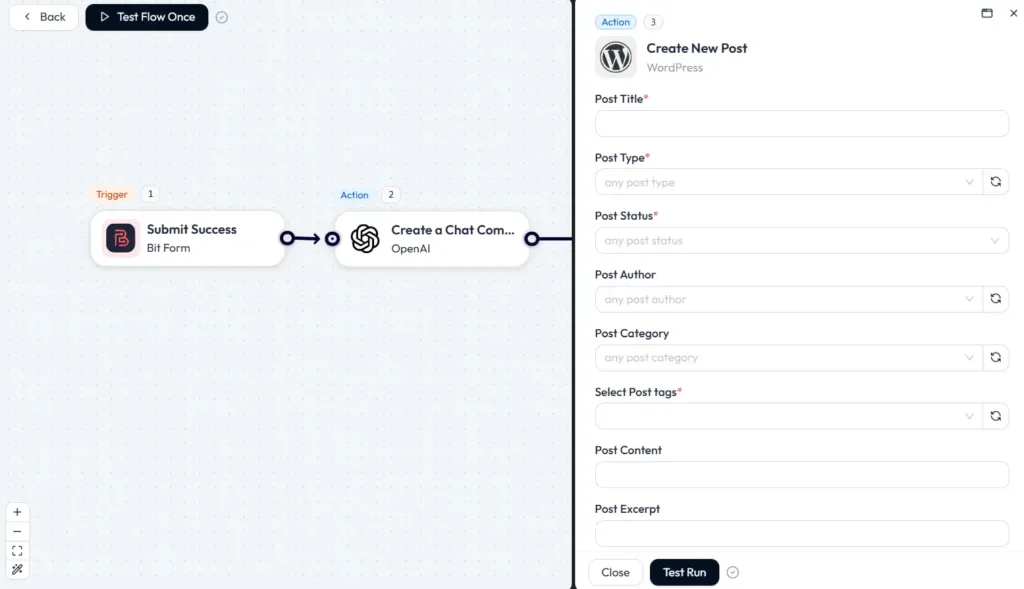
We just need to map the content here from the previous steps. From the first step (Bit Form), we will map the title, and from the second step (OpenAI), we will map the content generated by AI. Select Post Type as post and post status publish or draft. Also, you can add categories, tags, and more post-related things if you need. You can also add featured images for your post.
💡Post Title, Post Type, and Post Status fields are mandatory.

Once you are done with the mapping, click on the “Test Run” button. This will directly post your content to WordPress.
That’s it! You have successfully connected your WordPress site with ChatGPT. Now test with a form submit.
Here is the generated blog written by OpenAI using Bit Flows. This blog is directly posted to WordPress. The image is generated by using Bit Flows Gemini integrations (Nano Banana).
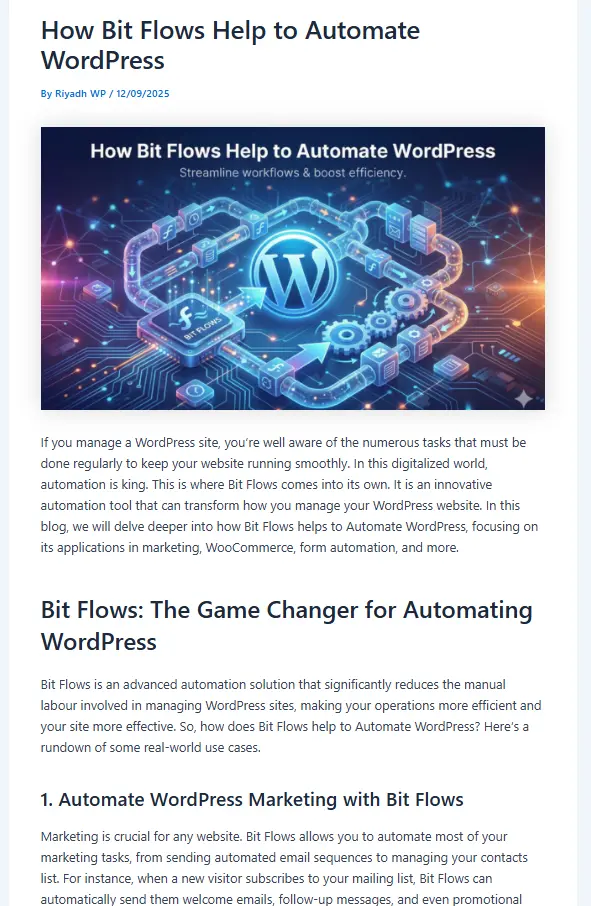
Always give hand touch to your AI-generated blog. Make your prompt clear and relatable.
Bit Flows also integrates other powerful AIs.
Gemini integrations expand your automation possibilities with advanced capabilities in content generation and contextual analysis. You can use it to generate creative content, analyze user inputs, or enhance your existing workflows with more intelligent outputs. Simply select “Ask Gemini,” enter your API key, and customize your prompt.
Claude offers chat or text completion actions. Use it to rewrite content in a friendly tone or create polite help responses. Choose “Ask Claude,” add your API key, and map your prompt.
DeepSeek provides actions to generate text or answer questions. Build AI knowledge bases where queries get answered from your own documents. Works like ChatGPT with simple prompt mapping.
Perplexity AI fetches factual answers and current data. Set up flows asking “list the latest smartphone market share” and have results emailed or added to sheets. Ideal for keeping content accurate.
Each integration uses the same intuitive process. Pick the AI action, enter credentials, write prompts with dynamic fields, and map outputs. Bit Flows handles JSON parsing automatically.
📝 Check out the pricing of each AI tool’s free API access limit. Most of the AI tools offer free API access.
1️⃣ Craft Clear Prompts with specific instructions and examples. Instead of “Write about social media,” try “Write a 800-word blog post titled ‘5 Social Media Marketing Tips for 2026’ with subheadings and a friendly tone.”
2️⃣ Use Dynamic Fields to personalize outputs. Insert tokens like {post_title} into prompts so each AI response stays on-topic.
3️⃣ Set the Right Parameters by choosing capable models like GPT-4 for substantial tasks. Adjust Max Tokens for longer outputs. Experiment with Temperature: lower (0.3) for factual content, higher (0.7) for creativity.
4️⃣ Test iteratively using Test Run after editing flows. Review logs to see AI outputs and tweak prompts until the content fits your voice.
5️⃣ Include Checks for critical content. Use moderation APIs or set conditions like “only publish if text contains certain keywords.”
6️⃣ Refine continuously as AI models improve. Keep an eye on updates and switch models when needed. Bit Flows makes swapping models easy.
Bit Flows minimizes risks through encryption and server-based hosting, making it safer than cloud-based automations.
Integrating AI into your WordPress site for free is simple with Bit Flows. This powerful AI automation plugin connects ChatGPT, Google Gemini, Claude, DeepSeek, and Perplexity without coding or high costs. Build workflows in minutes to auto-generate blog posts, SEO metadata, product descriptions, and more.
Bit Flows saves countless hours of manual work. Imagine waking up to new AI-written posts daily or never writing product descriptions manually again.
Ready to start? Install Bit Flows from the WordPress plugin repository and try these integrations. Explore our related guides on AI and WordPress automation for more ideas.
Get started today and turn your WordPress site into an AI-driven powerhouse. With Bit Flows, you have a no-cost, no-code solution that’s both easy and powerful.
Yes. Bit Flows is free to install and use. You need an OpenAI API key. OpenAI offers free trial credits. Connect ChatGPT to your site via simple workflows without any Bit Flows subscription.
Bit Flows supports Gemini with built-in actions at no cost. You need access to the Gemini API. Google may require sign-up or a Cloud account. Once you enter your API key, your site is linked.
No. Bit Flows uses a drag-and-drop design. Pick triggers and actions, type prompts, and map fields. Bit Flows handles API calls automatically. Documentation and community forums provide support.
Beyond ChatGPT and Gemini, connect Claude, DeepSeek, Perplexity, and more. Use webhooks for custom apps with APIs.
No. Bit Flows runs automations in the background using asynchronous queues. Front-end speed stays unaffected. Workflows pause during high server load and resume later.
AI providers bill by tokens or requests. Limit usage by adjusting flow frequency or prompt length. Bit Flows logs show token usage for cost tracking. Set reasonable max token counts to control spending.