WooCommerce emails you when a new order comes in. That works fine, right up until it doesn’t. You’re packing yesterday’s orders, replying to a refund request, or just away from your inbox, and the order sits there unnoticed for three hours. The customer paid by bank transfer, expected quick confirmation, and got silence.
A WooCommerce new order SMS alert fixes this in the most low-tech way possible: your phone buzzes the moment the order is created. Order number, customer name, total, payment method, status. You know whether it needs your attention without opening the dashboard.
In this guide, you’ll build that alert using Bit Flows and Twilio. No code, no webhook configuration by hand. I built this exact workflow on a test store while writing this, so the screenshots and the sample order you’ll see below are from a real setup.
Connect the WooCommerce On New Order Create trigger to the Twilio Send SMS action in Bit Flows. Capture a test WooCommerce order with Listen Response. Then connect Twilio with your Account SID and Auth Token, map the order fields into the Twilio message action event, run Test Flow Once, then activate the workflow.
Prepare the following:
Notes: Before Twilio trials, you sink an hour into this: trial accounts only send to verified phone numbers (up to five per account), only to the country you signed up from, and Twilio’s current trial documentation says custom SMS bodies may not be available on trial. So the custom order message in this tutorial might require a paid Twilio account.
When WooCommerce creates a new order, Bit Flows captures the order data and sends a formatted SMS to the administrator’s phone through Twilio.
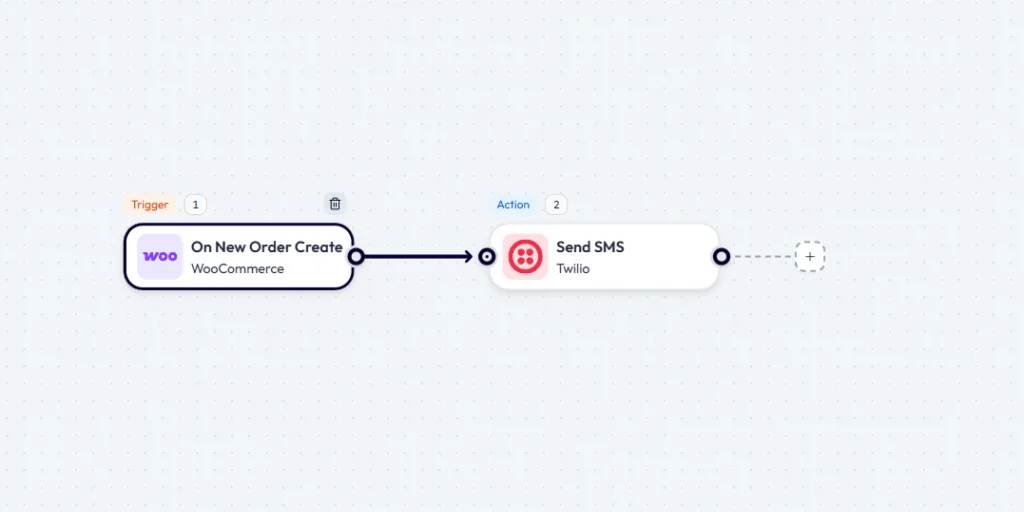
From your WordPress dashboard, open Bit Flows and create a new workflow. In the trigger step, select WooCommerce, then choose On New Order Create as the trigger event. Open the trigger node and click Listen Response.
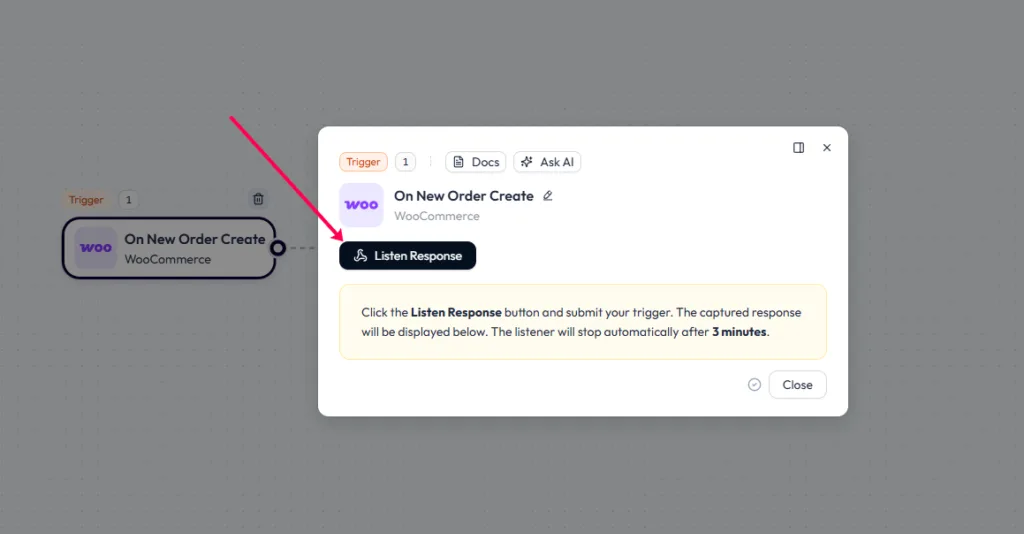
Bit Flows now waits for a real event from your store. You’ll see a countdown; the listener stays open for three minutes and stops automatically after that.
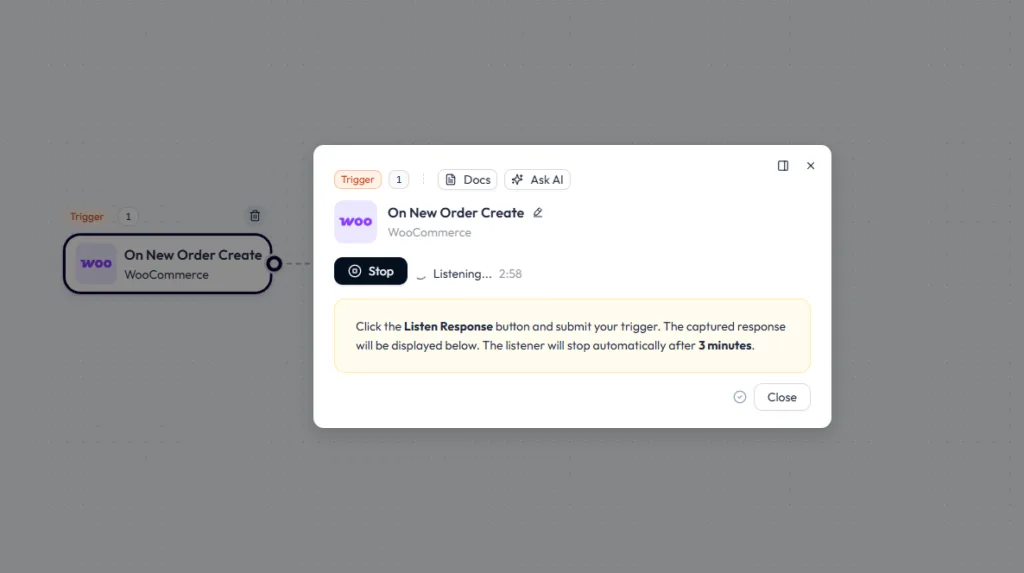
Keep this tab open and switch to your store in another tab.
Add your test product to the cart and complete the checkout process.
Use test information. Select a payment option that does not create an unwanted live charge, such as a properly configured test gateway or a suitable offline payment method.
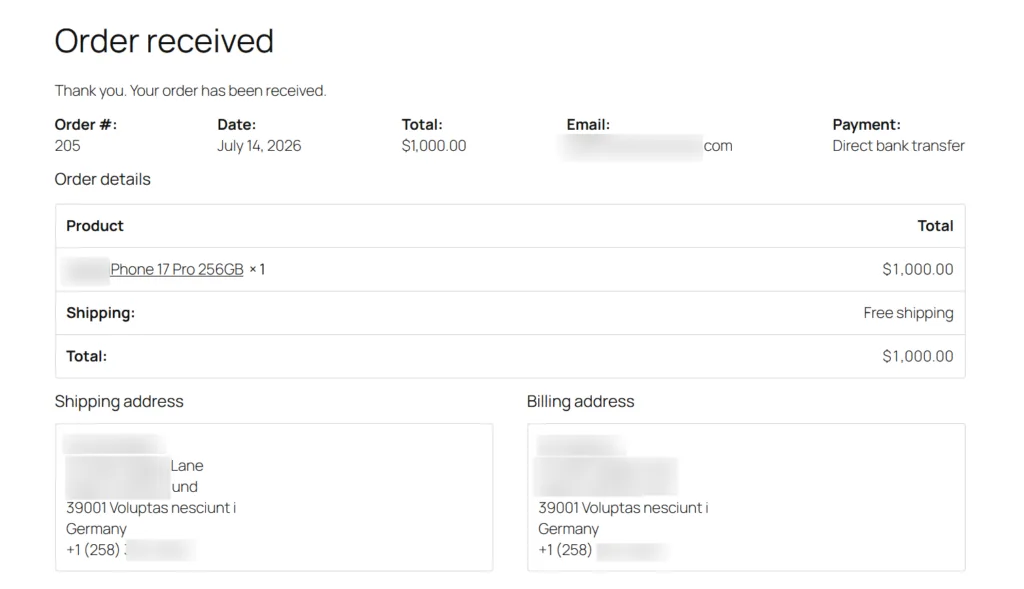
After WooCommerce displays the order-received page, return to Bit Flows.
When Bit Flows receives the test order, you will see a green Response captured confirmation. This means the WooCommerce trigger is working and the order data is ready for mapping.
Review the Captured Response and confirm that it includes the details you want to send in the SMS, such as:
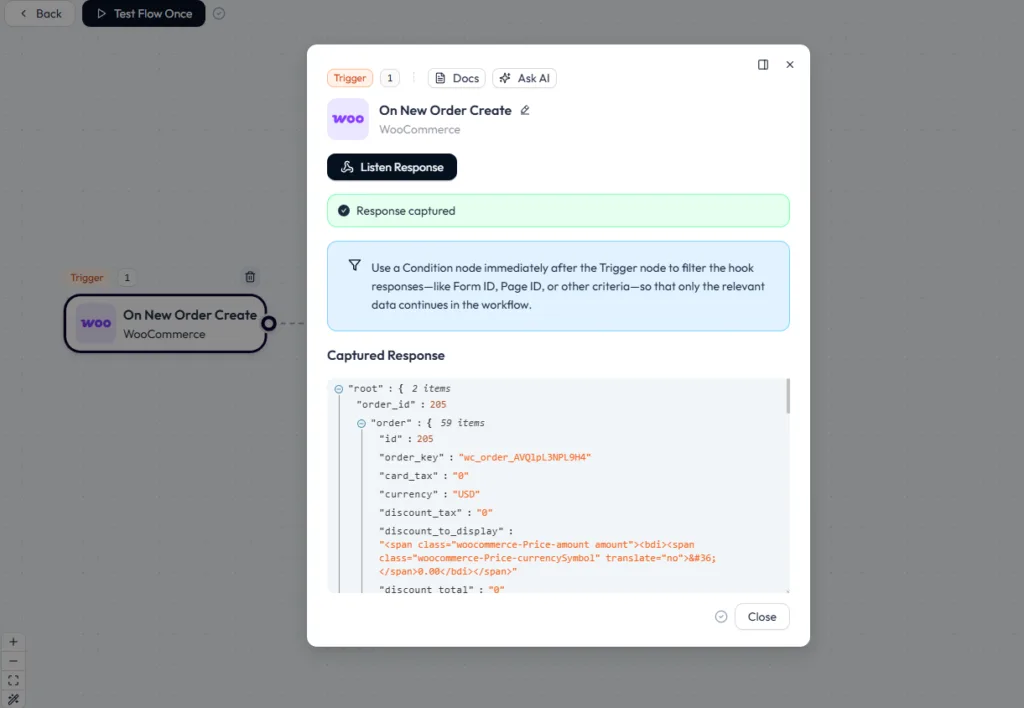
Close the trigger panel once you’ve confirmed the fields.
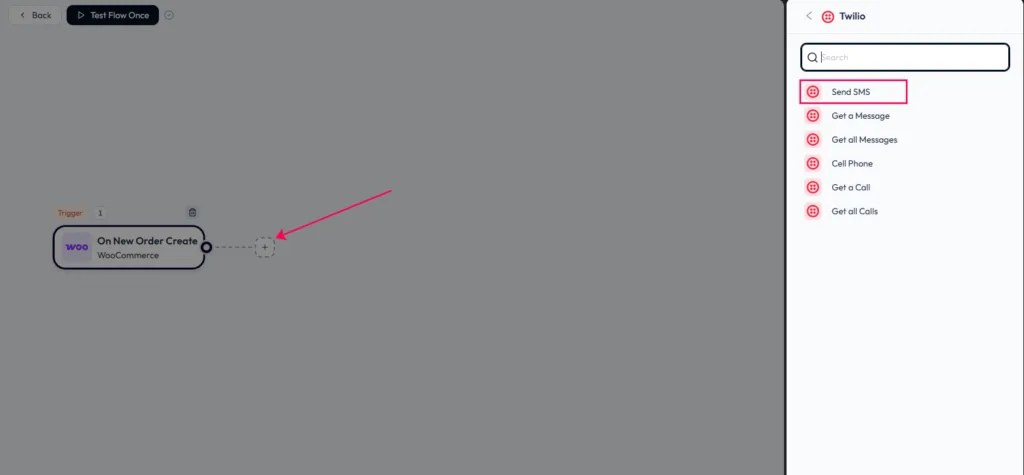
Click the plus icon next to the WooCommerce trigger. Search for Twilio, select it, and choose Send SMS from the list of actions.
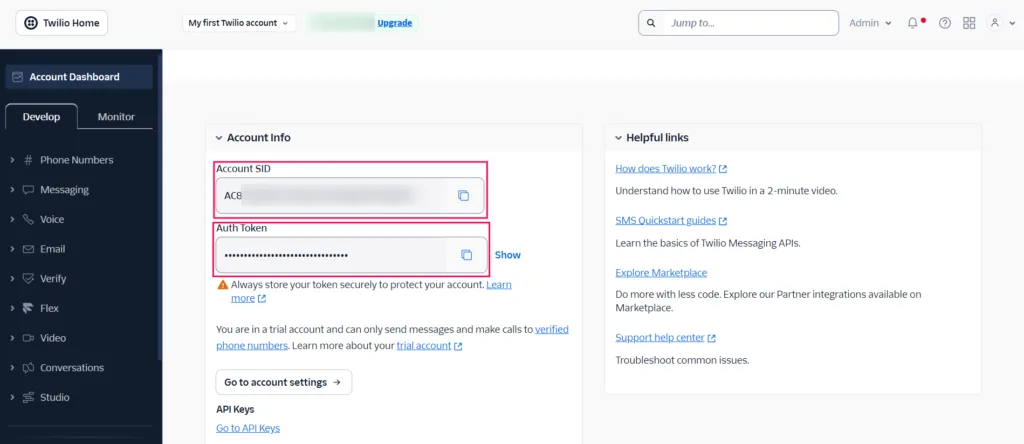
Bit Flows needs two credentials to talk to Twilio: your Account SID and Auth Token. Both live in the Account Info section of the Twilio Console dashboard. Sign in, copy the Account SID, then click Show next to the Auth Token and copy that too.
In the Twilio action, open Select Connection and click Add Connection. Keep Twilio Credentials selected, enter a clear name such as Store Twilio Connection, paste your Account SID into Key / Username and your Auth Token into Secret / Password, then click Connect to authorize Bit Flows to send SMS through your Twilio account.
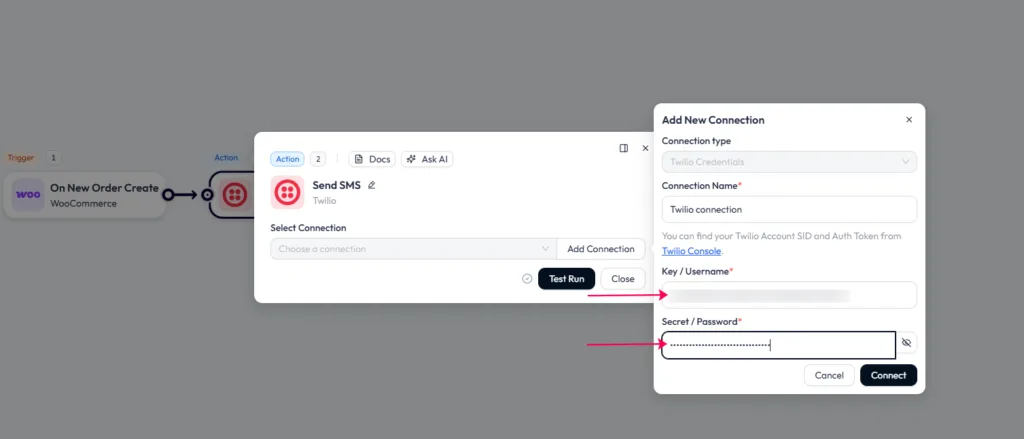
Two mistakes you may face here. First, using Twilio’s test credentials instead of the live Account SID and Auth Token from Account Info; the test credentials won’t send real messages. Second, pasting a phone number into these fields. Your Twilio number goes in the next step.
In the Send SMS action, turn on Use Message Service, then pick your service from the Message Service dropdown. In this setup it’s the “My Organization” service.
A Twilio Messaging Service is a container that groups your senders and messaging settings under one name. You can create and manage services under Messaging → Services in the Twilio Console. Before selecting one in Bit Flows, make sure the service has at least one eligible sender in its Sender Pool; otherwise, Twilio will accept the request and then quietly fail to deliver.
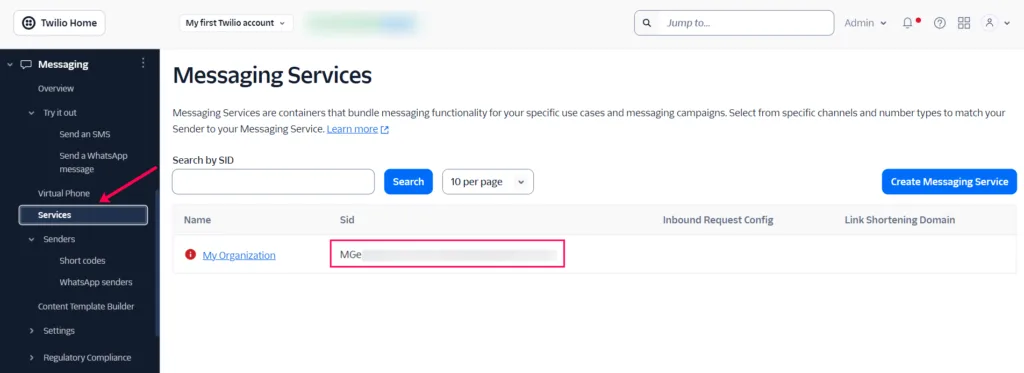
Once the service is selected, you can’t set a Sender Phone Number; the service decides which sender the message goes out from.
In Recipient Phone Number, enter the store administrator’s number as a fixed value; the correct format looks like +8801XXXXXXXXX. Twilio is strict about Spaces, hyphens, or a missing country code; you get error 21211 (invalid number).
The recipient also has to be a different number from the sender, which sounds obvious until you’re testing at midnight with only one SIM card in the room.
Click inside the Message field to open the variable panel, then use the Apps tab to map the fields. Here’s the message structure I used:
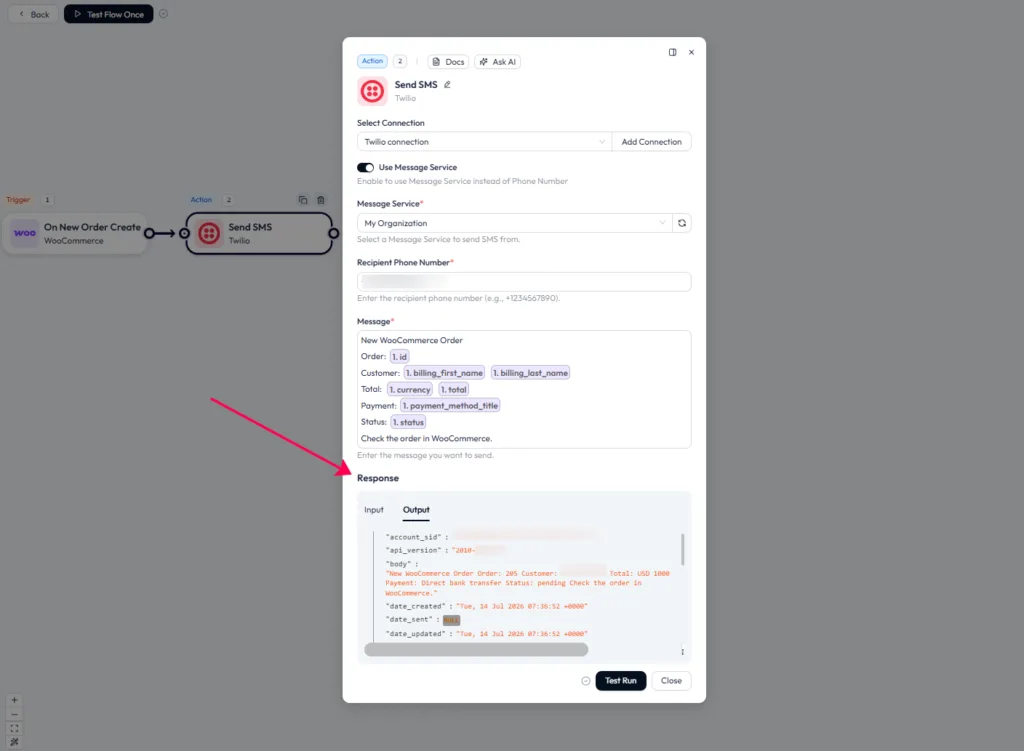
Now click Test Run. Bit Flows shows Twilio’s response in the panel, and the Output tab confirms the composed body, with the order values filled in exactly as you mapped them. You can confirm it from two places. First, check the admin’s phone; the SMS should have arrived.
Or open your Twilio dashboard under Monitor → Logs → Messaging and open the latest message. There you’ll see the delivered body, the recipient, the cost ( for a single segment), the region, and the number of message segments.
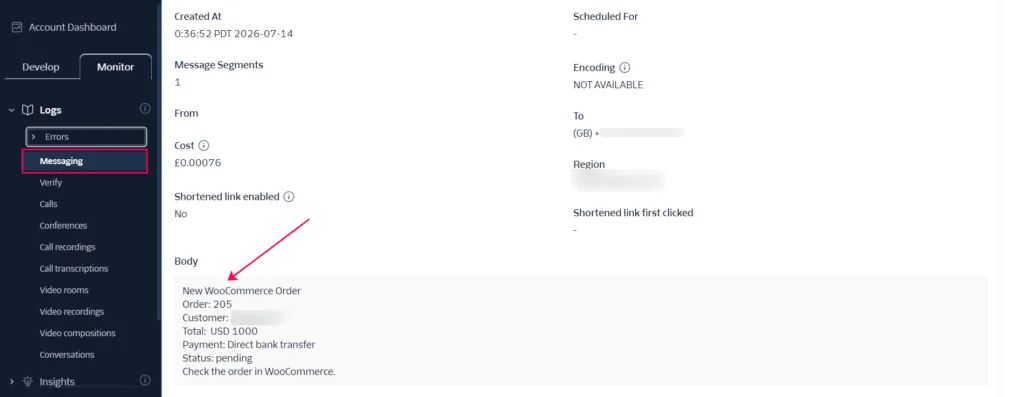
That’s your proof the message left Twilio and was delivered.
The Test Run only proves Twilio accepts your sample data. Then test the whole chain end to end.
Close the action panel and click Test Flow Once, then place another test order in your store. Give Bit Flows a moment to run, check the admin’s phone, and confirm the SMS shows the new order’s values rather than the old test data. Open the Bit Flows logs to review both the trigger and the action.
Once a fresh order sends the correct SMS, make sure the Active toggle is on.
That’s the full setup. From now on, every new sale pings your phone instantly, no code required. Before you trust it, send one real purchase through with Test Flow Once and check the text arrives correctly, then switch it live.
Once it’s running, that same captured data can branch into other tools like Google Sheets, Slack, or a CRM. Get this first version working end-to-end, then expand from there.
Yes, connect WooCommerce’s On New Order Create trigger to Twilio’s Send SMS action and map the captured order data into the message.
Bit Flows uses your live Account SID as Key / Username and your Auth Token as Secret / Password when creating the Twilio connection.
You can map the order ID, customer name, total, currency, payment method, and order status when those values appear in the captured response.
A Messaging Service is optional, but when you use one, it must contain at least one eligible sender in its Sender Pool before sending messages.
Yes, but trial accounts can message only verified recipients in the sign-up country and must use Twilio-provided templates instead of custom SMS bodies.
Error 21608 means the recipient is unverified, 21408 means the destination is disabled, and 21211 means the phone number is invalid or incorrectly formatted.
Click Listen Response again and place a fresh test order before the three-minute listener expires, then check for the green Response captured confirmation.
Yes, add a Condition after the WooCommerce trigger to filter orders by status, payment method, destination, total, or another captured value.





 EN
EN  DE
DE  ES
ES  NL
NL  IT
IT  PT
PT  JA
JA