Shopify store transforms how you sell online. You can create, edit, and manage your store easily. The platform offers all that you require to sell services or products online. Shopify is one of the popular e-commerce solutions for small businesses, and big enterprises.
As your company grows and you receive more orders. So you need to do many repetitive tasks such as updating customer information and sheets. What if you can automate those with the help of some automation tools? It will save time and make selling efficient.
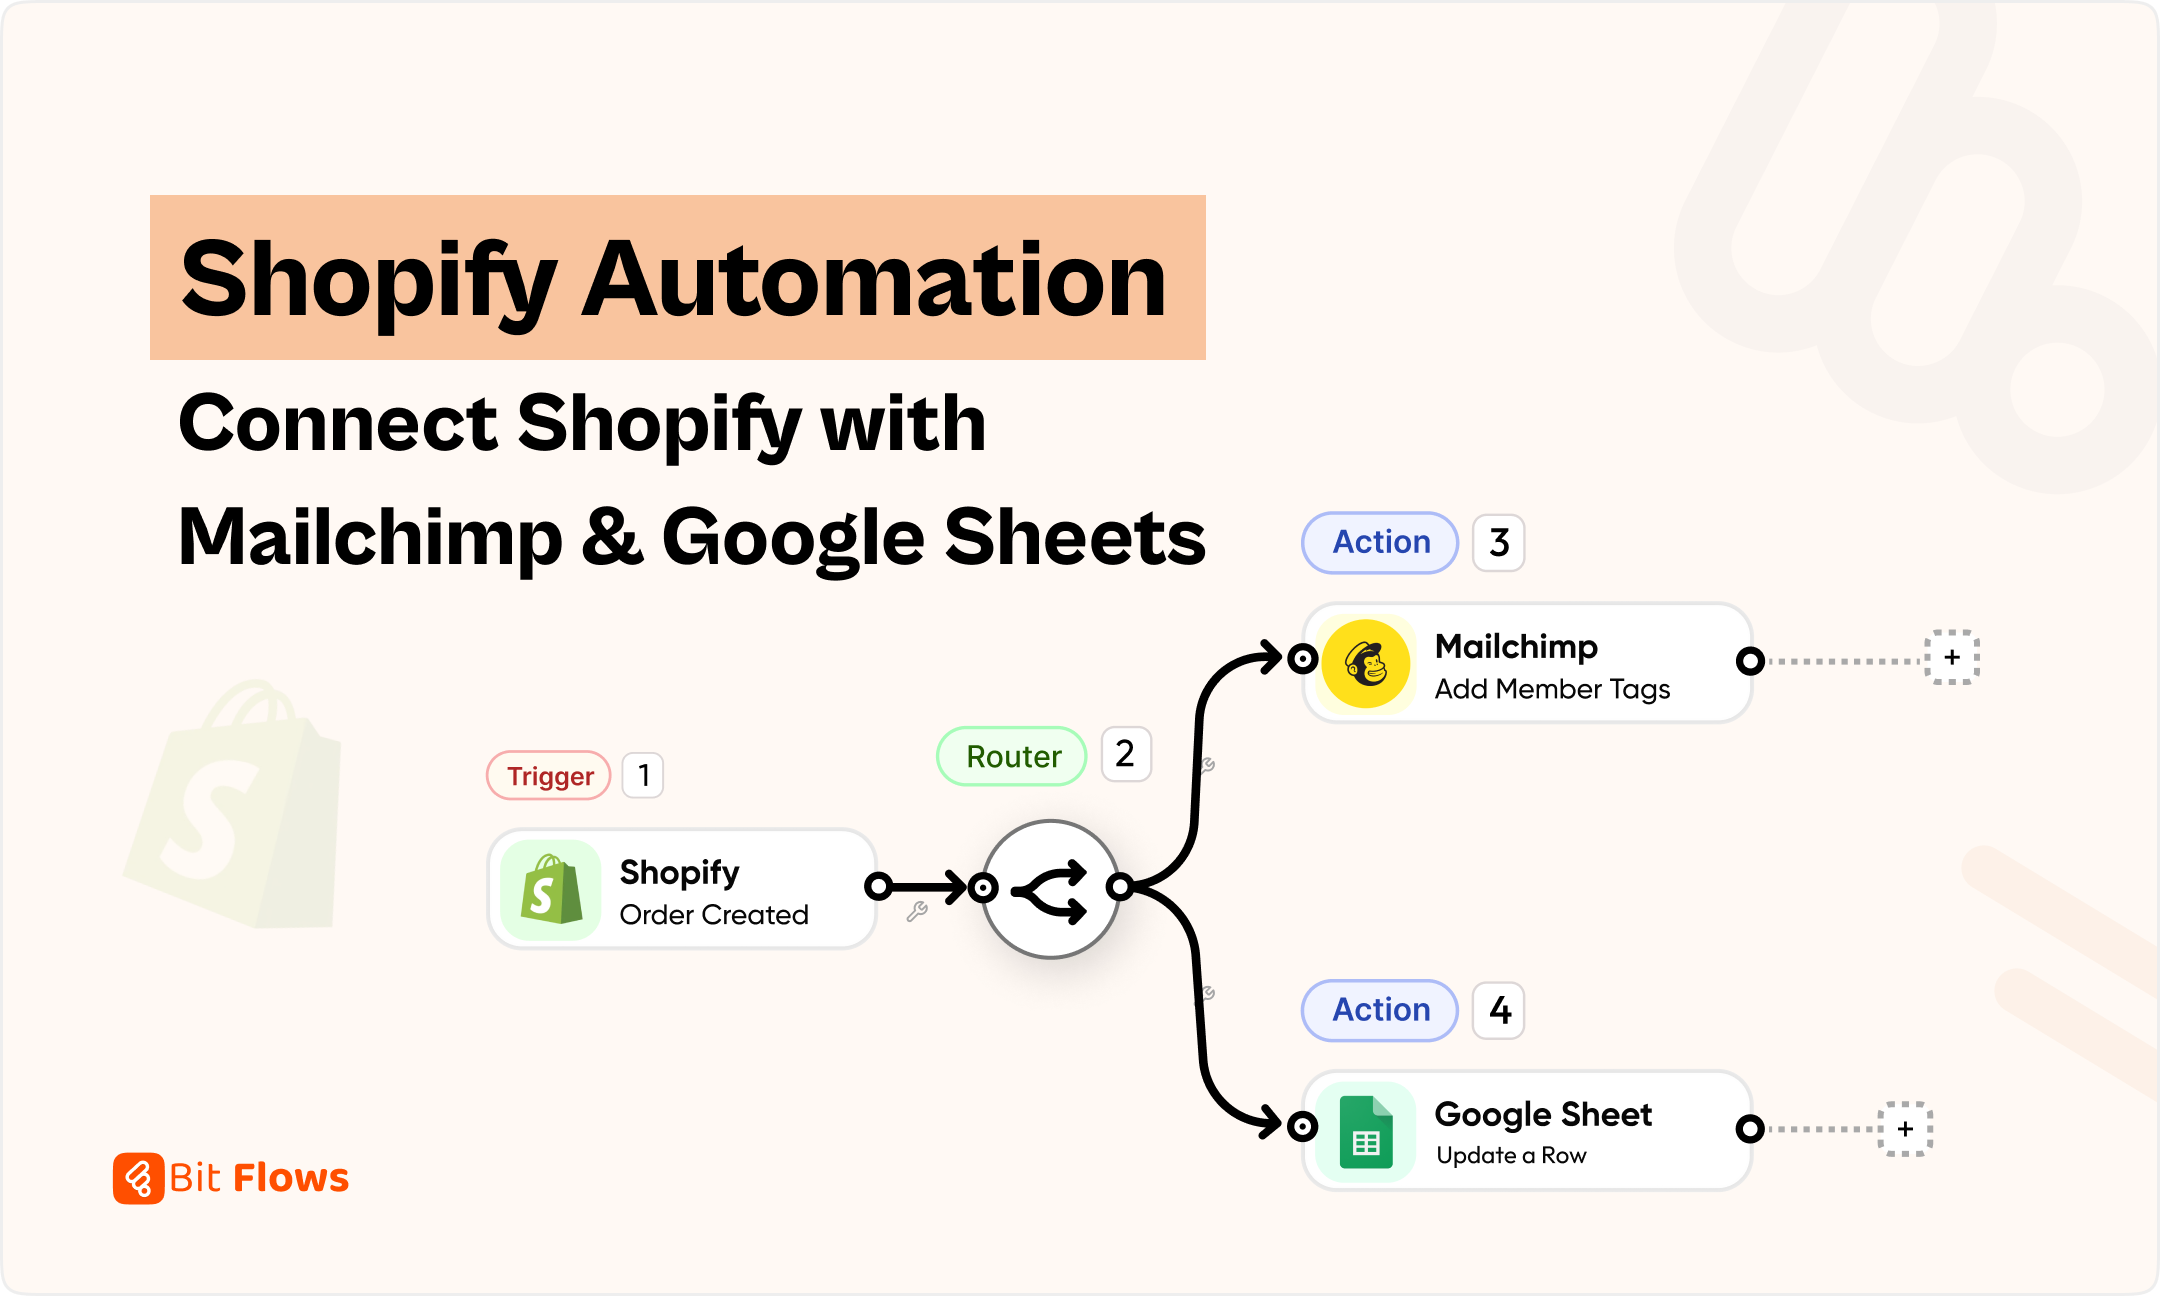
You can connect Shopify with Mailchimp and Google Sheets to make your business run more smoothly. Each time a customer makes a purchase on your Shopify store, customer information is automatically sent to Mailchimp to be used in email marketing and to Google Sheets for easy tracking. That does sound cool, right? Let’s take a look at how you can do it easily.
Every Shopify sale is more than just a transaction. It’s a chance to build a strong relationship with a customer. By connecting your Shopify customer information with Mailchimp, you can run effective email marketing campaigns.
As an example, when a customer makes their first purchase, you can trigger a personalized automatic welcome email, ensuring a good first impression. Over time, you are able to segment customers based on what they have previously ordered, for example, grouping those that order more regularly or fans of a certain type of product, enabling special campaigns to be sent.
This allows you to sell additional products, for example, suggesting matching accessories to a customer who has just bought a dress. Automated processes can also allow you to reach out to customers who haven’t shopped in a long time and offer them to buy again, increasing their lifetime value to your business.

With Shopify integration with Google Sheets, you can send customer information to Google Sheets automatically. Which makes it easier for you to monitor and analyze the potential buyers. By having your customer lead details, like the names, and their contact information, you ensure that your data is always up to date and correct.
This integration also enables you to design your own reports from the lead data. Which allows you to simply analyze your customer and sales pipeline behavior. You can also show this data to your team members in real-time to enable better collaboration, hassle-free decision-making, and quicker follow-ups. By not requiring you to manually enter data, you are gaining time and reducing the risk of inaccuracy.
For example, I have created a chart using online shop data. Which displays the total orders and total amount spent in popular categories of an e-commerce store.

Creating these types of charts in Google Sheets will help you to understand customer behavior and trends. It also gives you a clear insight into best-selling categories, spending patterns, and sales performance.
Now let’s create the workflow to automate Shopify with Marlchimp and Google Sheets. As the trigger, we will add the Shopify “Checkout Creation” webhook and split it with the router tool. And then we will add MailChimp and Google Sheets to the workflow and configure them. Below is the visual flow of the workflow that we are going to create in Bit Flows:
Follow the step-by-step guide to connect Shopify with Mailchimp and Google Sheets.
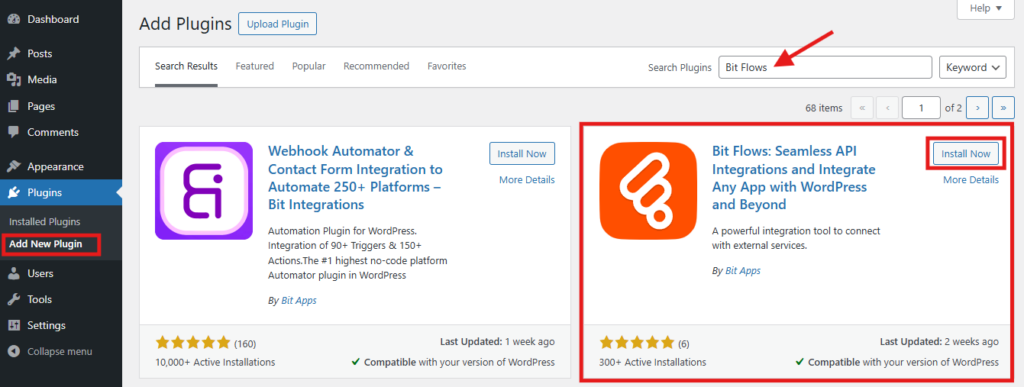
First, you need to install and activate Bit Flows on your WordPress site. To install Bit Flows, navigate to your WordPress dashboard>Plugins>Add new and search for Bit Flows. Once you see the plugin install and activate it.
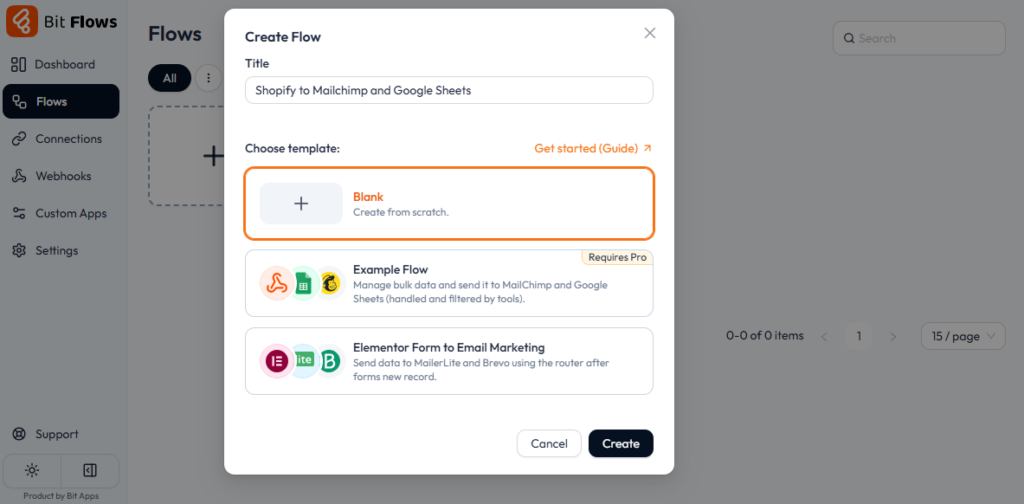
Log into your Bit Flows dashboard and click on “Create Flow.” Then, give your flow a meaningful name, such as “Shopify to Mailchimp and Google Sheets” so you can easily identify its purpose later.
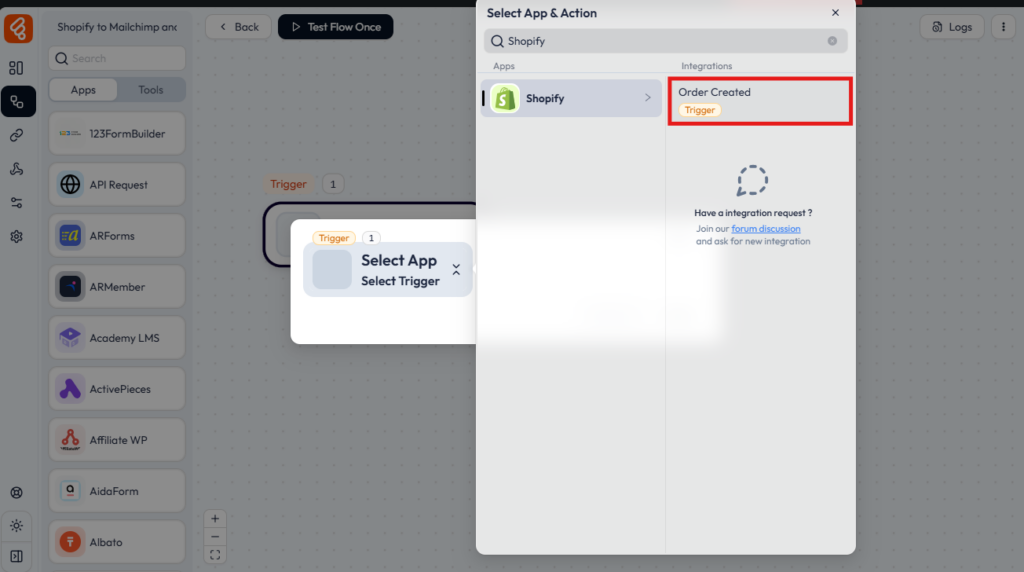
Now search for the Shopify app and select the Shopify app as the Trigger.
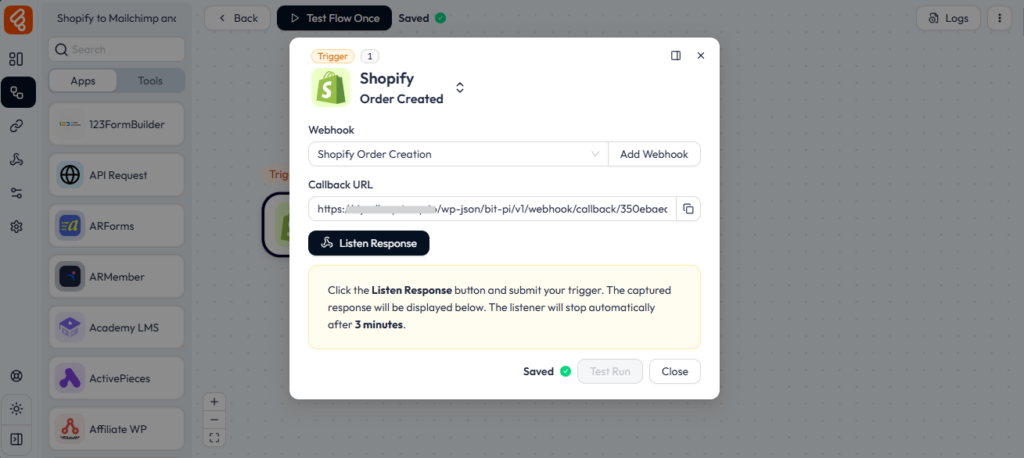
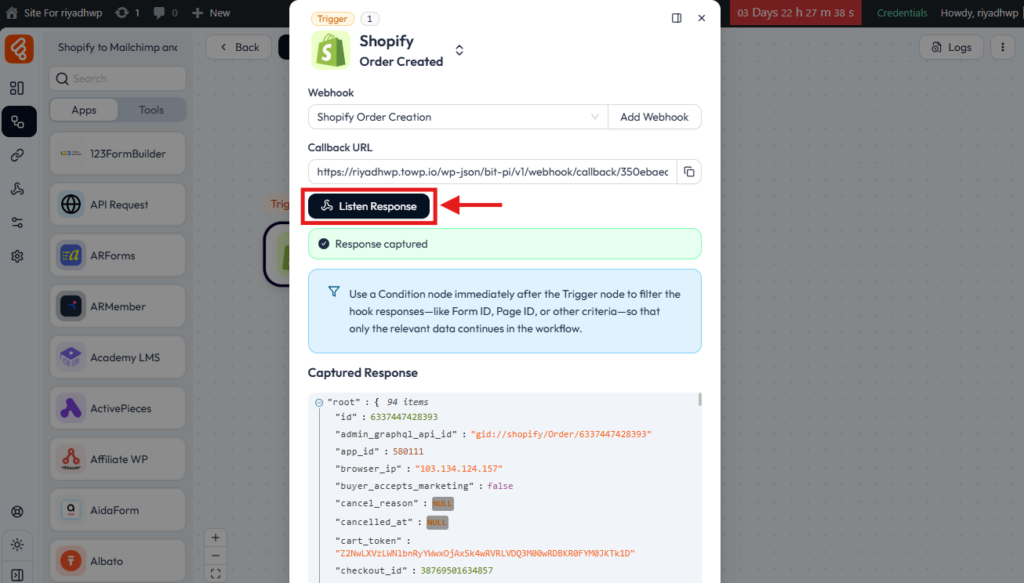
You will get a Callback URL here, you need to add the URL on the Shopify webhook. Copy the Callback URL.
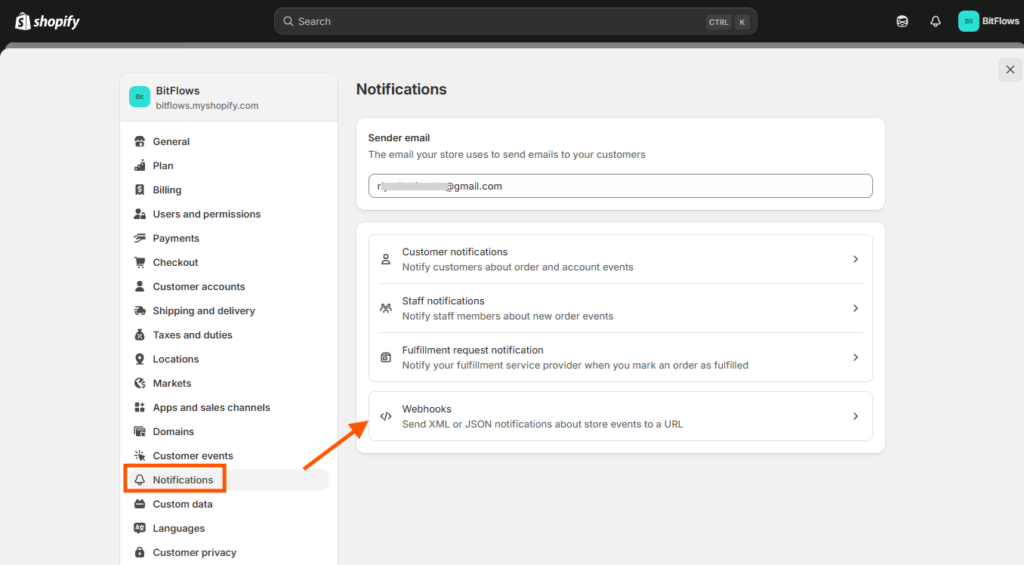
Shopify offers many webhooks, such as order creation, cart creation, and customer creation. For this configuration, we’ll use the Order Creation webhook to trigger automation when a new order is created. In Shopify, navigate to Settings > Notifications > Webhooks.
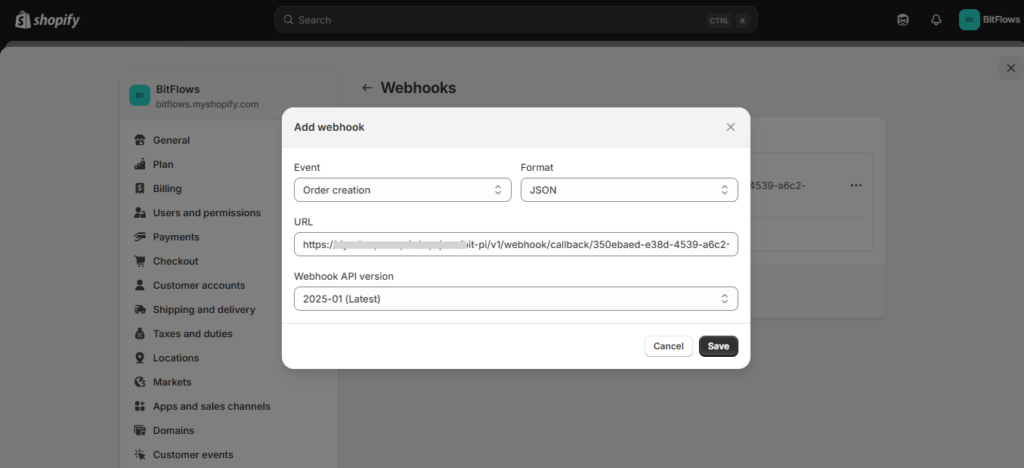
Create a new webhook and select Order Creation as the event. Copy the Callback URL provided by Bit Flows and paste it into the Shopify webhook setup. Select your preferred Webhook API version and hit the Save button.
Now click on the Listen Response button on Bit Flows and make a test checkout on your Shopify store. This will get all the required data for field mapping to other apps.
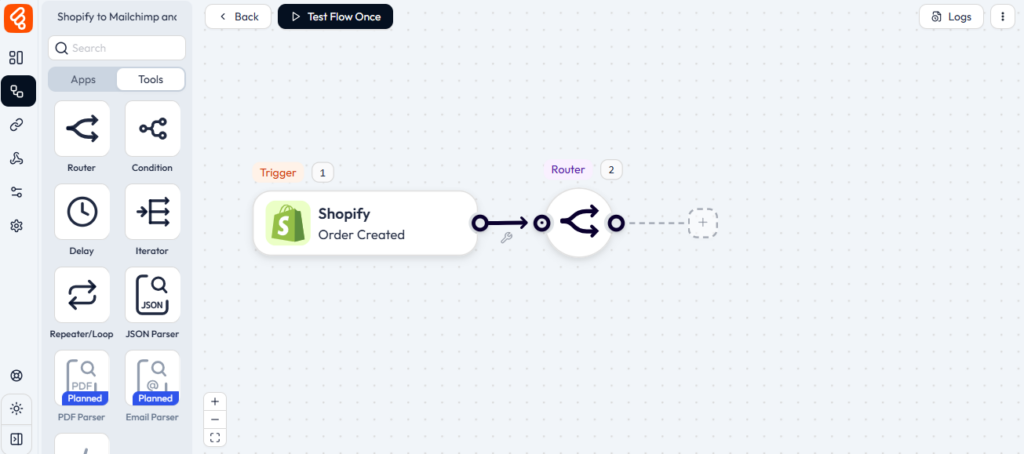
In Bit Flows, add a Router right after the Shopify trigger. So that we can make two branches, one for Mailchimp and another for Google Sheets.
On one path of the Router, add a Mailchimp Action. You can easily drag and drop Mailchimp from the Apps tab of Bit Flows.

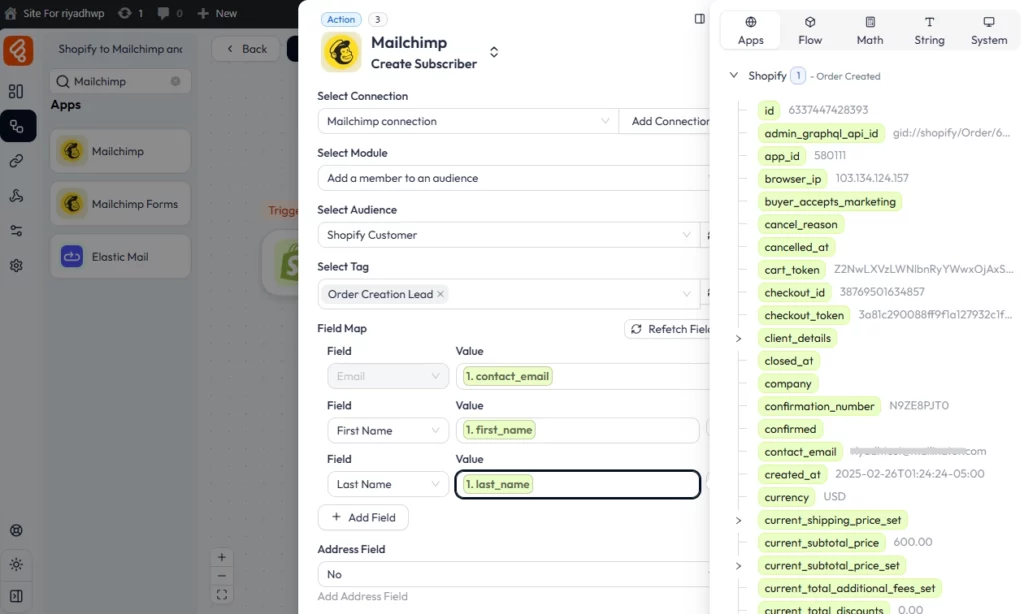
Now click on the Mailchimp app and select “Create Subscriber” as the event. Here you need to provide the Client ID and Client Secret. Create an app on MailChimp add the Client ID and Client secret to the respective fields and hit the save button. You need to authenticate your MailChimp account after hitting the save button.

Select your module, audience, and tag then map the customer’s email, name, and other relevant details from Shopify to the corresponding Mailchimp fields.
Done! you have successfully configured Shopify with your MailChimp account. Now every new customer will automatically added to your MailChimp list.
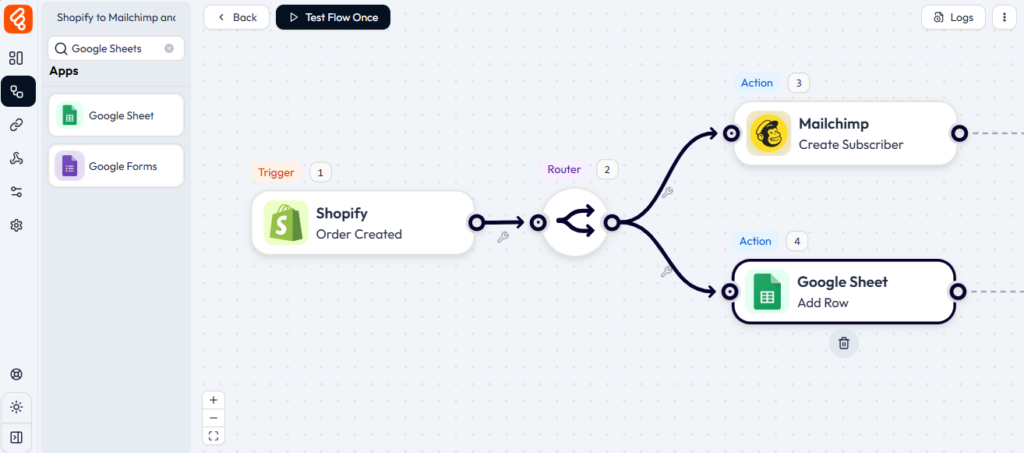
On the second path of the Router, add Google Sheets as an Action. Connect your Google account and select the spreadsheet where you want to send the data.
Then, map Shopify order details like customer name, email, order ID, and total amount to the appropriate columns in your spreadsheet.
📌 Follow this guide to connect your Google Sheets in Bit Flows.
Place some test orders in Shopify to ensure that the customer data flows to both Mailchimp and Google Sheets. Once confirmed, your automation is live! You have successfully connected your Shopify store with MailChimp and Google Sheets!
It’s not only a time-saver, but a game-changer, to connect Shopify with Mailchimp and Google Sheets through Bit Flows. You can easily manage customer relationships through targeted email marketing or analyzing data for business insights. Bit Flows puts you one step ahead of the competition.
With unlimited workflows, quick field mapping, advanced automation tools, custom app, Bit Flows provides flexibility like none other. You also get premium support from the Bit Apps forum, live chat, email support, and an active Facebook group. From startups to big companies, Bit Flows is your affordable solution in automation.
Try Bit Flows today and give your Shopify store the automation it needs!
You can connect Shopify with Mailchimp using Bit Flows. It will send your customer data to Mailchimp whenever a new order is placed.
Yes! Using Bit Flows, you can send Shopify order details to both Mailchimp (for email marketing) and Google Sheets (for tracking) automatically.
Automating Shopify with Mailchimp helps you build your email list, send personalized emails, recover abandoned carts, and increase repeat sales.
With Bit Flows, you can use Shopify’s “Order Created” webhook to send customer emails and details directly to Mailchimp as new subscribers.
Yes! Shopify offers webhooks for cart creation, checkout creation, customer creation, and more, all of which can be automated with Bit Flows.