Looking for the easiest way to build no-code API integrations and connect your favorite apps and services without writing a single line of code?
Meet Bit Flows! a powerful, self-hosted WordPress plugin that lets you build multi-step automation workflows using a visual drag-and-drop builder. It helps your platform connect to other apps and services without any complex setup.
You need to simply pick a trigger and actions, and connect them in a flow. Because it runs on your own site, your data stays private, and you don’t pay extra fees for each task. Bit Flows has a clean, beginner-friendly interface, so even someone new to automation can set up flows easily.
The plugin currently has 190+ native integrations, and the list is growing continuously. But what if you need something that is not natively connected with Bit Flows?
Don’t worry! Bit Flows has the easiest solution for you. By building a custom app in Bit Flows, you can connect with any apps or services. Let’s see how Bit Flows’ custom app helps you build custom No-Code API integrations.
🔹 Quick Summary
This tutorial shows how to build No-Code API Integrations using Bit Flows’ custom app builder to connect any external apps or services easily.
Tools Used: Bit Flows Pro, Blogger API Auth (OAuth2/API Key).
✅ Steps to Follow
✔️ Open the Custom App builder
✔️ Add request URL and choose method (GET, POST, etc.)
✔️ Enable authentication (OAuth2, API Key, etc.)
✔️ Test and connect the API
✔️ Add the custom app to your workflow
And now, your custom integration will work automatically every time the workflow runs.
A custom No-Code API integration is like building a special bridge between Bit Flows and any online service that isn’t built in by default. Many services offer APIs, which are just web addresses and keys that let one app talk to another. When Bit Flows doesn’t already have a built-in app for a service you want, you can create a Custom App.
This custom app tells Bit Flows exactly how to call that service’s API. It means you can use Bit Flows to do things like post to your Blogger account, send data to a custom database, or whatever else the API allows. Bit Flows lets you create API connections for services not natively supported.
Custom no-code API integrations unlock limitless possibilities: you define the API details once, and then you can automate tasks with that service over and over without writing any code.
Bit Flows is designed with ease and flexibility in mind. With its no-code workflow builder, anyone can set up triggers and actions without technical skills. Instead of writing scripts, you point and click. You get a modern, drag-and-drop canvas where you add steps one by one. For example, to connect to a new service, you just create a custom app, enter a few details, and you’re done for automation magic!
Bit Flows even highlights each step with clear forms. Because it is self-hosted, you have full control over your data and no recurring fees per task. Bit Flows allows unlimited tasks and flows, so you can scale without surprises. This makes API integration simple, visual, and affordable, perfect for beginners and expert automation users.
Follow these friendly steps to make a new custom app in Bit Flows. We’ll use this app to connect to Blogger, but you could use any service with an API.
In your WordPress dashboard, go to Bit Flows > Custom Apps. This is where you manage integrations that you build by yourself.
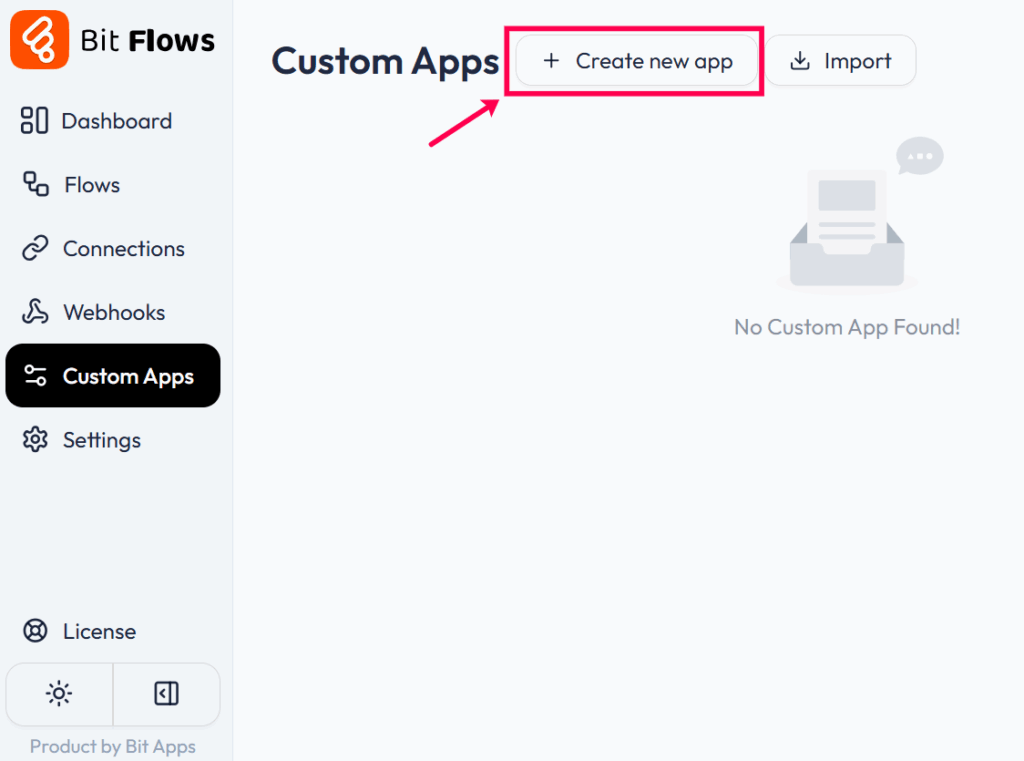
Now, click on the Create new app button to make a Custom App. Give your app a name like “My Blogger Connector” and a short description. This helps you remember what it’s for.

After clicking on the Create button, the custom app creation interface will appear. Here you need to select the type of event; whether it’s a trigger or an action, and then need to add the request URL.

Next, choose the Request URL type. You can select GET, POST, PUT, PATCH, or DELETE based on what you want to do.
Since I want to post on Blogger, I’ll choose POST and enter the Request URL. You’ll get this URL from the app or service you’re connecting to. For this use case, I got the Request URL on the Blogger API page.

💡 Tips: You need to add your blog ID to the blogId part of this URL. You will get the blogId on your Blogger dashboard.
Now you need to toggle on the Enable Authentication button. This is essential to connect your app with Bit Flows. Bit Flows supports these connection types:
Choose the one that matches your app’s authentication method. For example, if you’re connecting to Blogger, you’ll need to use OAuth 2.

When you choose OAuth 2 for authentication, Bit Flows will need a couple of keys from you. Don’t worry! It sounds complicated, but it’s just a few copy-paste steps:
Find the Callback/Redirect URL: In your custom app’s Auth settings, Bit Flows shows a Callback/Redirect URI. Copy this URL, it’s where Google will send you back after logging in.

Get Google API keys: Go to the Google Cloud Console or Google API Console. Create a new project or select an existing one.

Then go to APIs & Services > Credentials and make an OAuth 2.0 Client ID. When it asks for an Authorized Redirect URI, paste the URL from Bit Flows. Then Google will give you a Client ID and Client Secret.

Paste into Bit Flows: Back in your custom app settings, paste the Client ID and Secret into the OAuth 2 fields. If Bit Flows asked for any Scope or other info, use the defaults from Google (for Blogger, it’s usually the Blogger API scope).

Save and Connect: Click Save. Then click Connect or Authorize in Bit Flows. A Google login window will appear. Sign in to your account and approve. Once done, Bit Flows will show that the account is connected.
You’re connected! Bit Flows now has access to use Blogger without needing your password again. In short, we copy the redirect URL, create credentials in Google, paste them back, and hit authorize. As promised, it’s easier than it sounds.
Now you can easily add the custom app to your workflows!

ℹ️ Note: You need Bit Flows Pro subscription to build custom APIs with the custom app.
Creating no-code API integrations is easy with Bit Flows. Even beginners can build custom apps and automate complex tasks without writing a single line of code. In this guide, you saw how to make a custom app, add a Blogger-post action, and set up OAuth 2 with just a few clicks.
Remember, the hardest part is just getting started. Bit Flows handles the rest. Now you have the tools to connect pretty much any service to your platform. Give Bit Flows a try, and soon you’ll be automating your workflows like a pro, all while saving time and effort. Happy automating!